Create Client
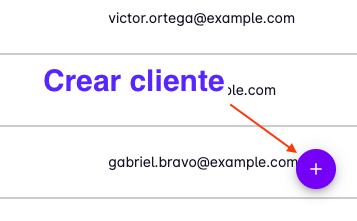
To create a client, go to the clients page and click the "Create client" button.
This will open a panel with a form where you can enter the client's basic information:
- Name — the name you want to use to identify the client
- Internal code — if you use an internal code to identify your clients, you can enter it here
- Contact name — the name of the person you deal with at the company
- Contact phone — the phone number of the contact person
- Contact email — the email address of the contact person
- Description — use this field to add useful notes about the client
- Tax ID — for invoicing and other administrative purposes
- Bill to — the name to be used for billing
- Sales goal — a reminder of the sales target for this client
- Projects — projects this client is classified under
- Teams — staff at your company responsible for this client
- Salesperson — the salesperson assigned to this client
Basic Information
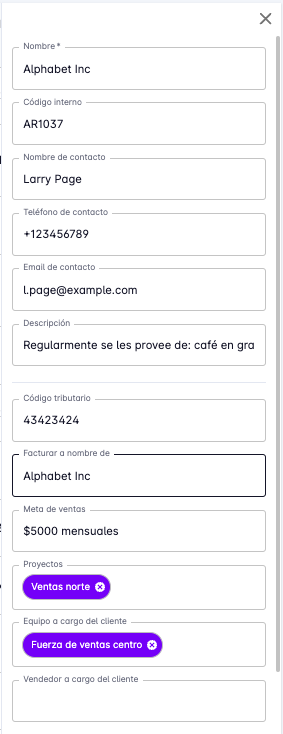
The "Name" field is the only required field; all other fields are optional.
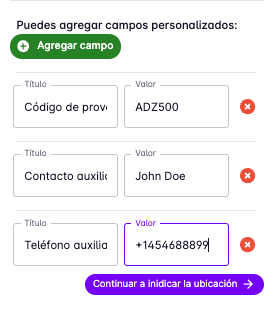
You can also add extra fields if the ones above are not enough.
Simply press the "Add field" button and a new field will appear for you to enter the information you need.
Location Information
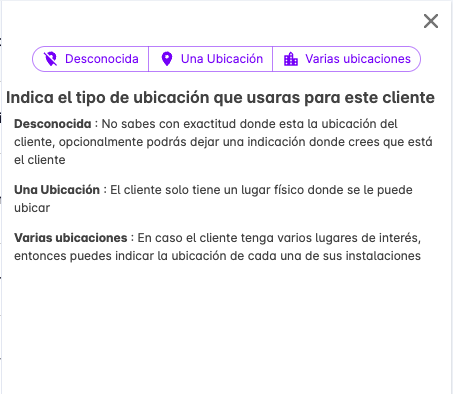
At the bottom of the form you will see a button labeled "Continue to set location".
Pressing it will open a new form where you can enter the client's address.

You will first be asked to choose the type of address for this client:
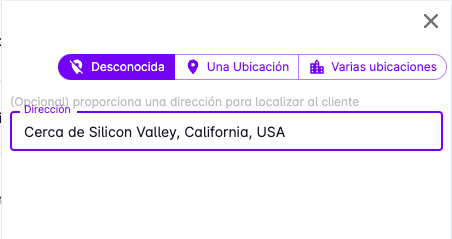
- Unknown — if you have no address information; you can optionally add a reference note.
- One location — if the client operates from a single location, enter it here.
- Multiple locations — use this option if the client has several locations (branches, stores, service points). In OptaCheck each location is called a Place.
If you choose "Unknown", simply enter a reference note to help identify the location, or leave it blank.
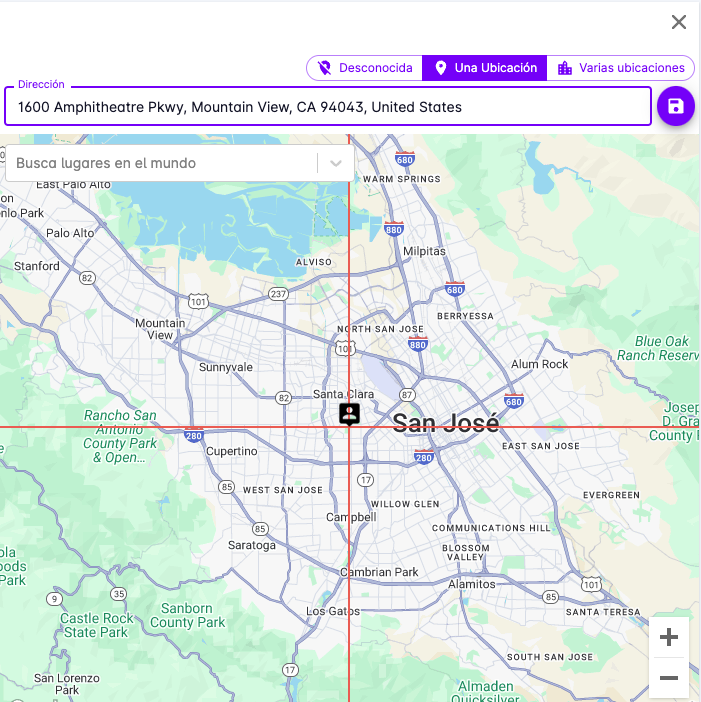
If you choose "One location", a form will appear where you can enter the client's address and pin the exact location on a map. This is very useful so that field users can navigate to the client when making deliveries or visits.
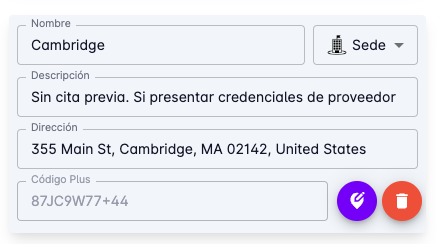
If you choose "Multiple locations" (also called "Places"), a form will appear where you can enter the type of place, its name, a description, the address, and its position on a map.
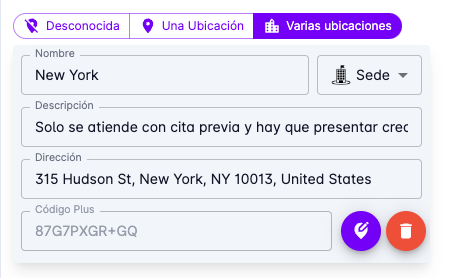
Press "Add a new place" to add more locations for the client.

Press the following button to set the position on the map.

To set the exact position, drag the map until the center marker is over the desired location.
You can use the search box to find a specific address, or enter coordinates directly.
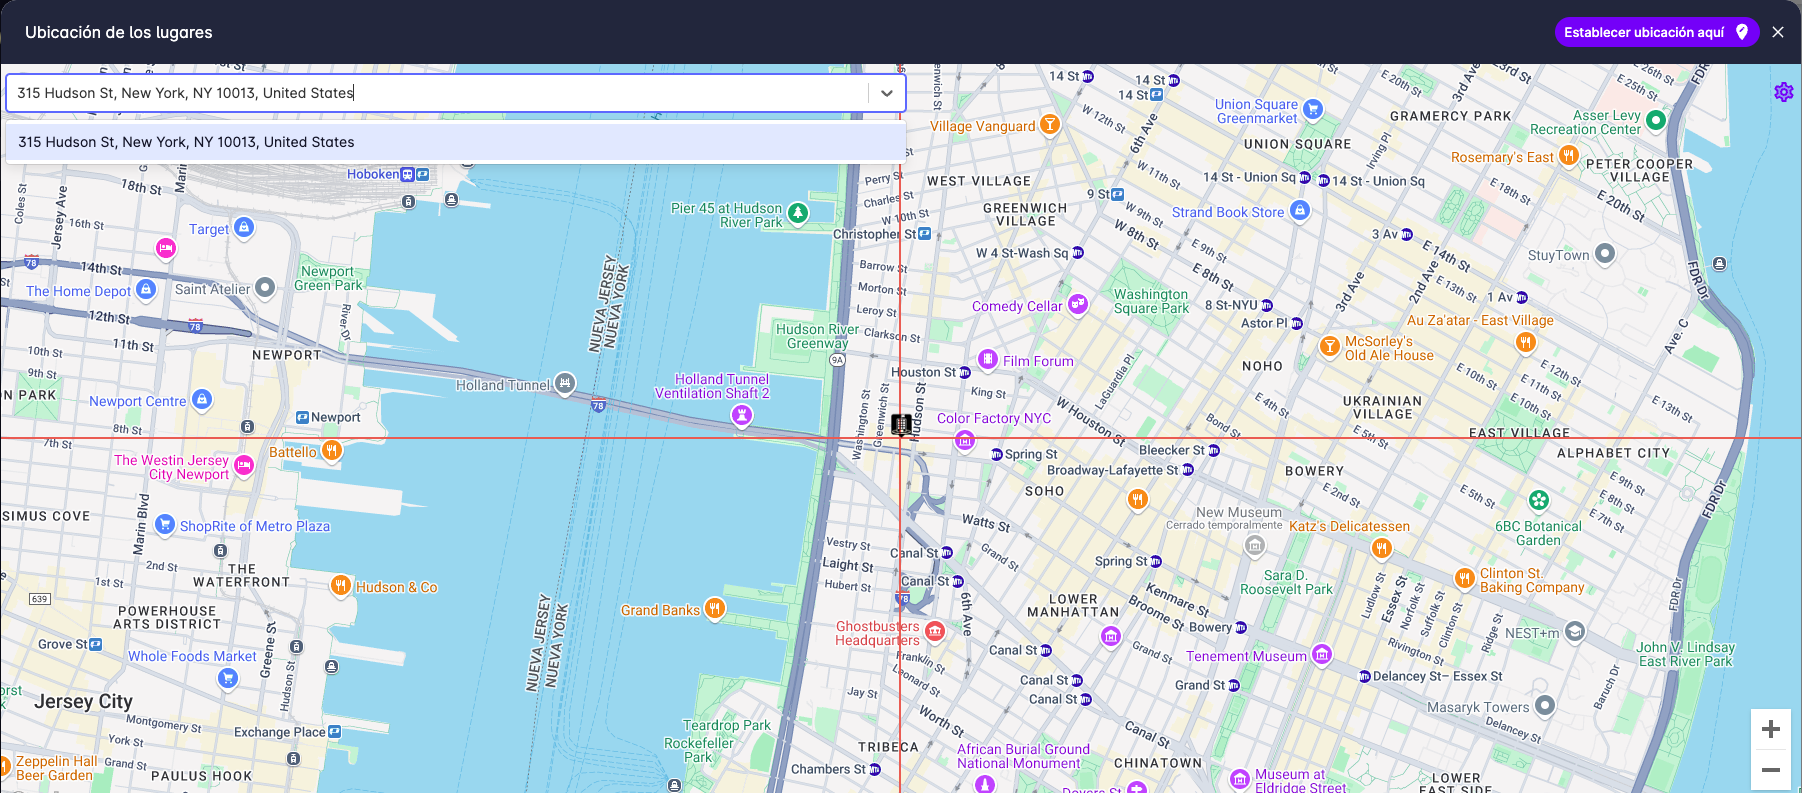
After setting the position on the map, a Plus Code will be generated, which is useful for sharing the location.
Another example of how to define a place:
When you are satisfied with the information you have entered, press the "Save" button.
