Configuration
To configure the Workspace, open the navigation and select the Configuration option.
This will open the configuration page, where you can see the available configuration options.
It is divided into three sections: a general section, a tasks section, and a location section.

General
In the general section, you can configure the following elements:
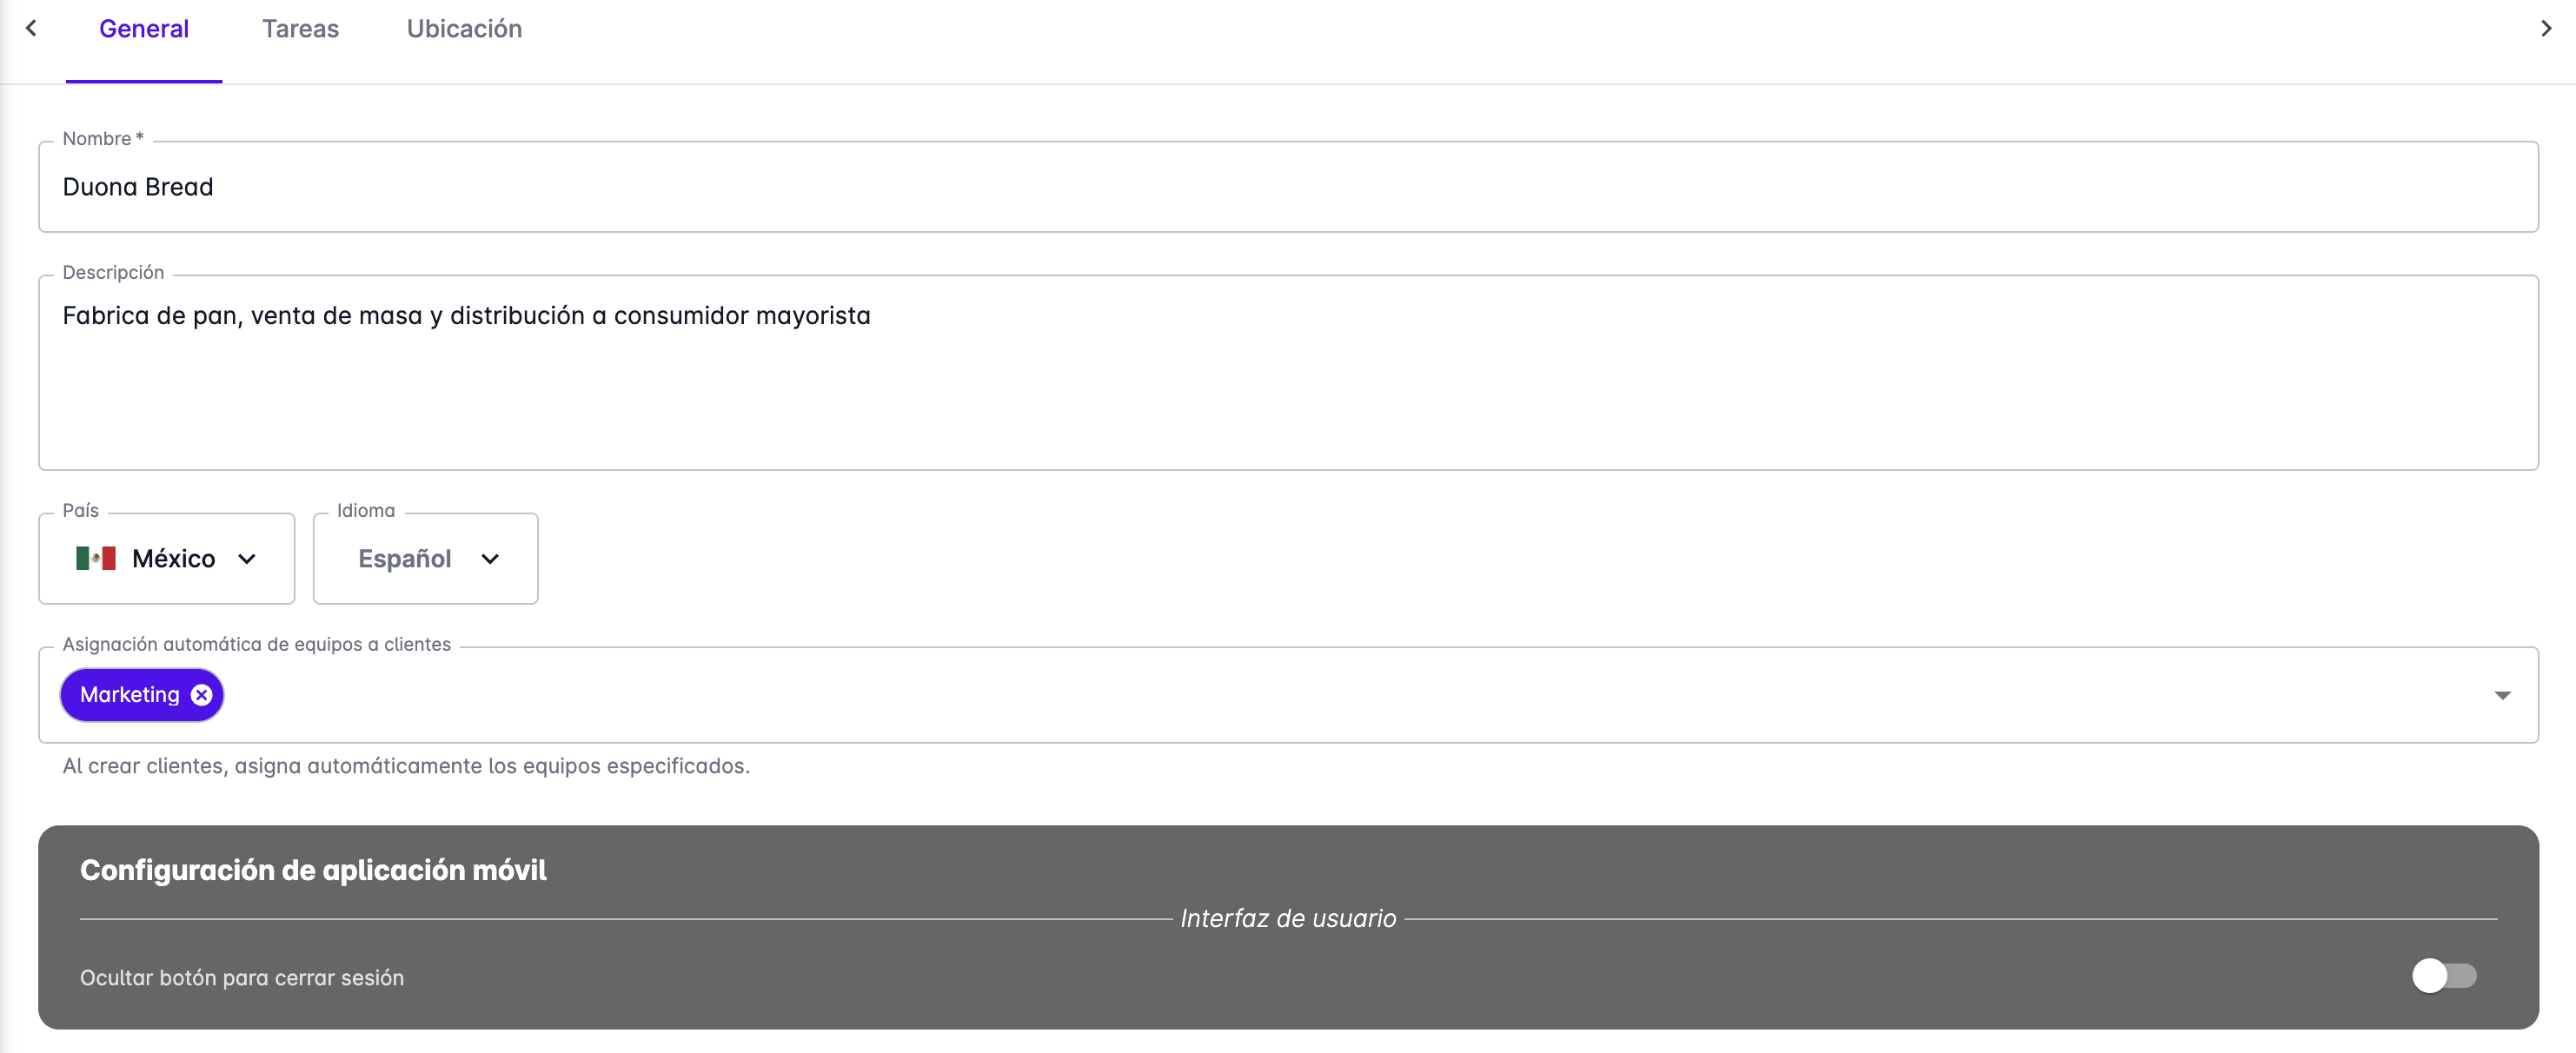
- Workspace name - You can usually enter the company name or the department name where OptaCheck is used. This is the name that will be shown in the navigation bar.
- Description - A short description of the workspace. You can include additional information about the workspace.
- Country - Select the country where the company is located or where the workspace users work.
- Language - Select the preferred language to be used in the workspace. Users can change the language in their profile.
- Automatic team assignment - You can choose the default teams that every new client must have.
Mobile App-Specific Section
This section contains settings that apply only to the OptaCheck mobile app.
- Hide logout button - If you enable this option, the logout button will not be shown in the mobile app.
Tasks
The tasks section contains settings that apply only to task management.
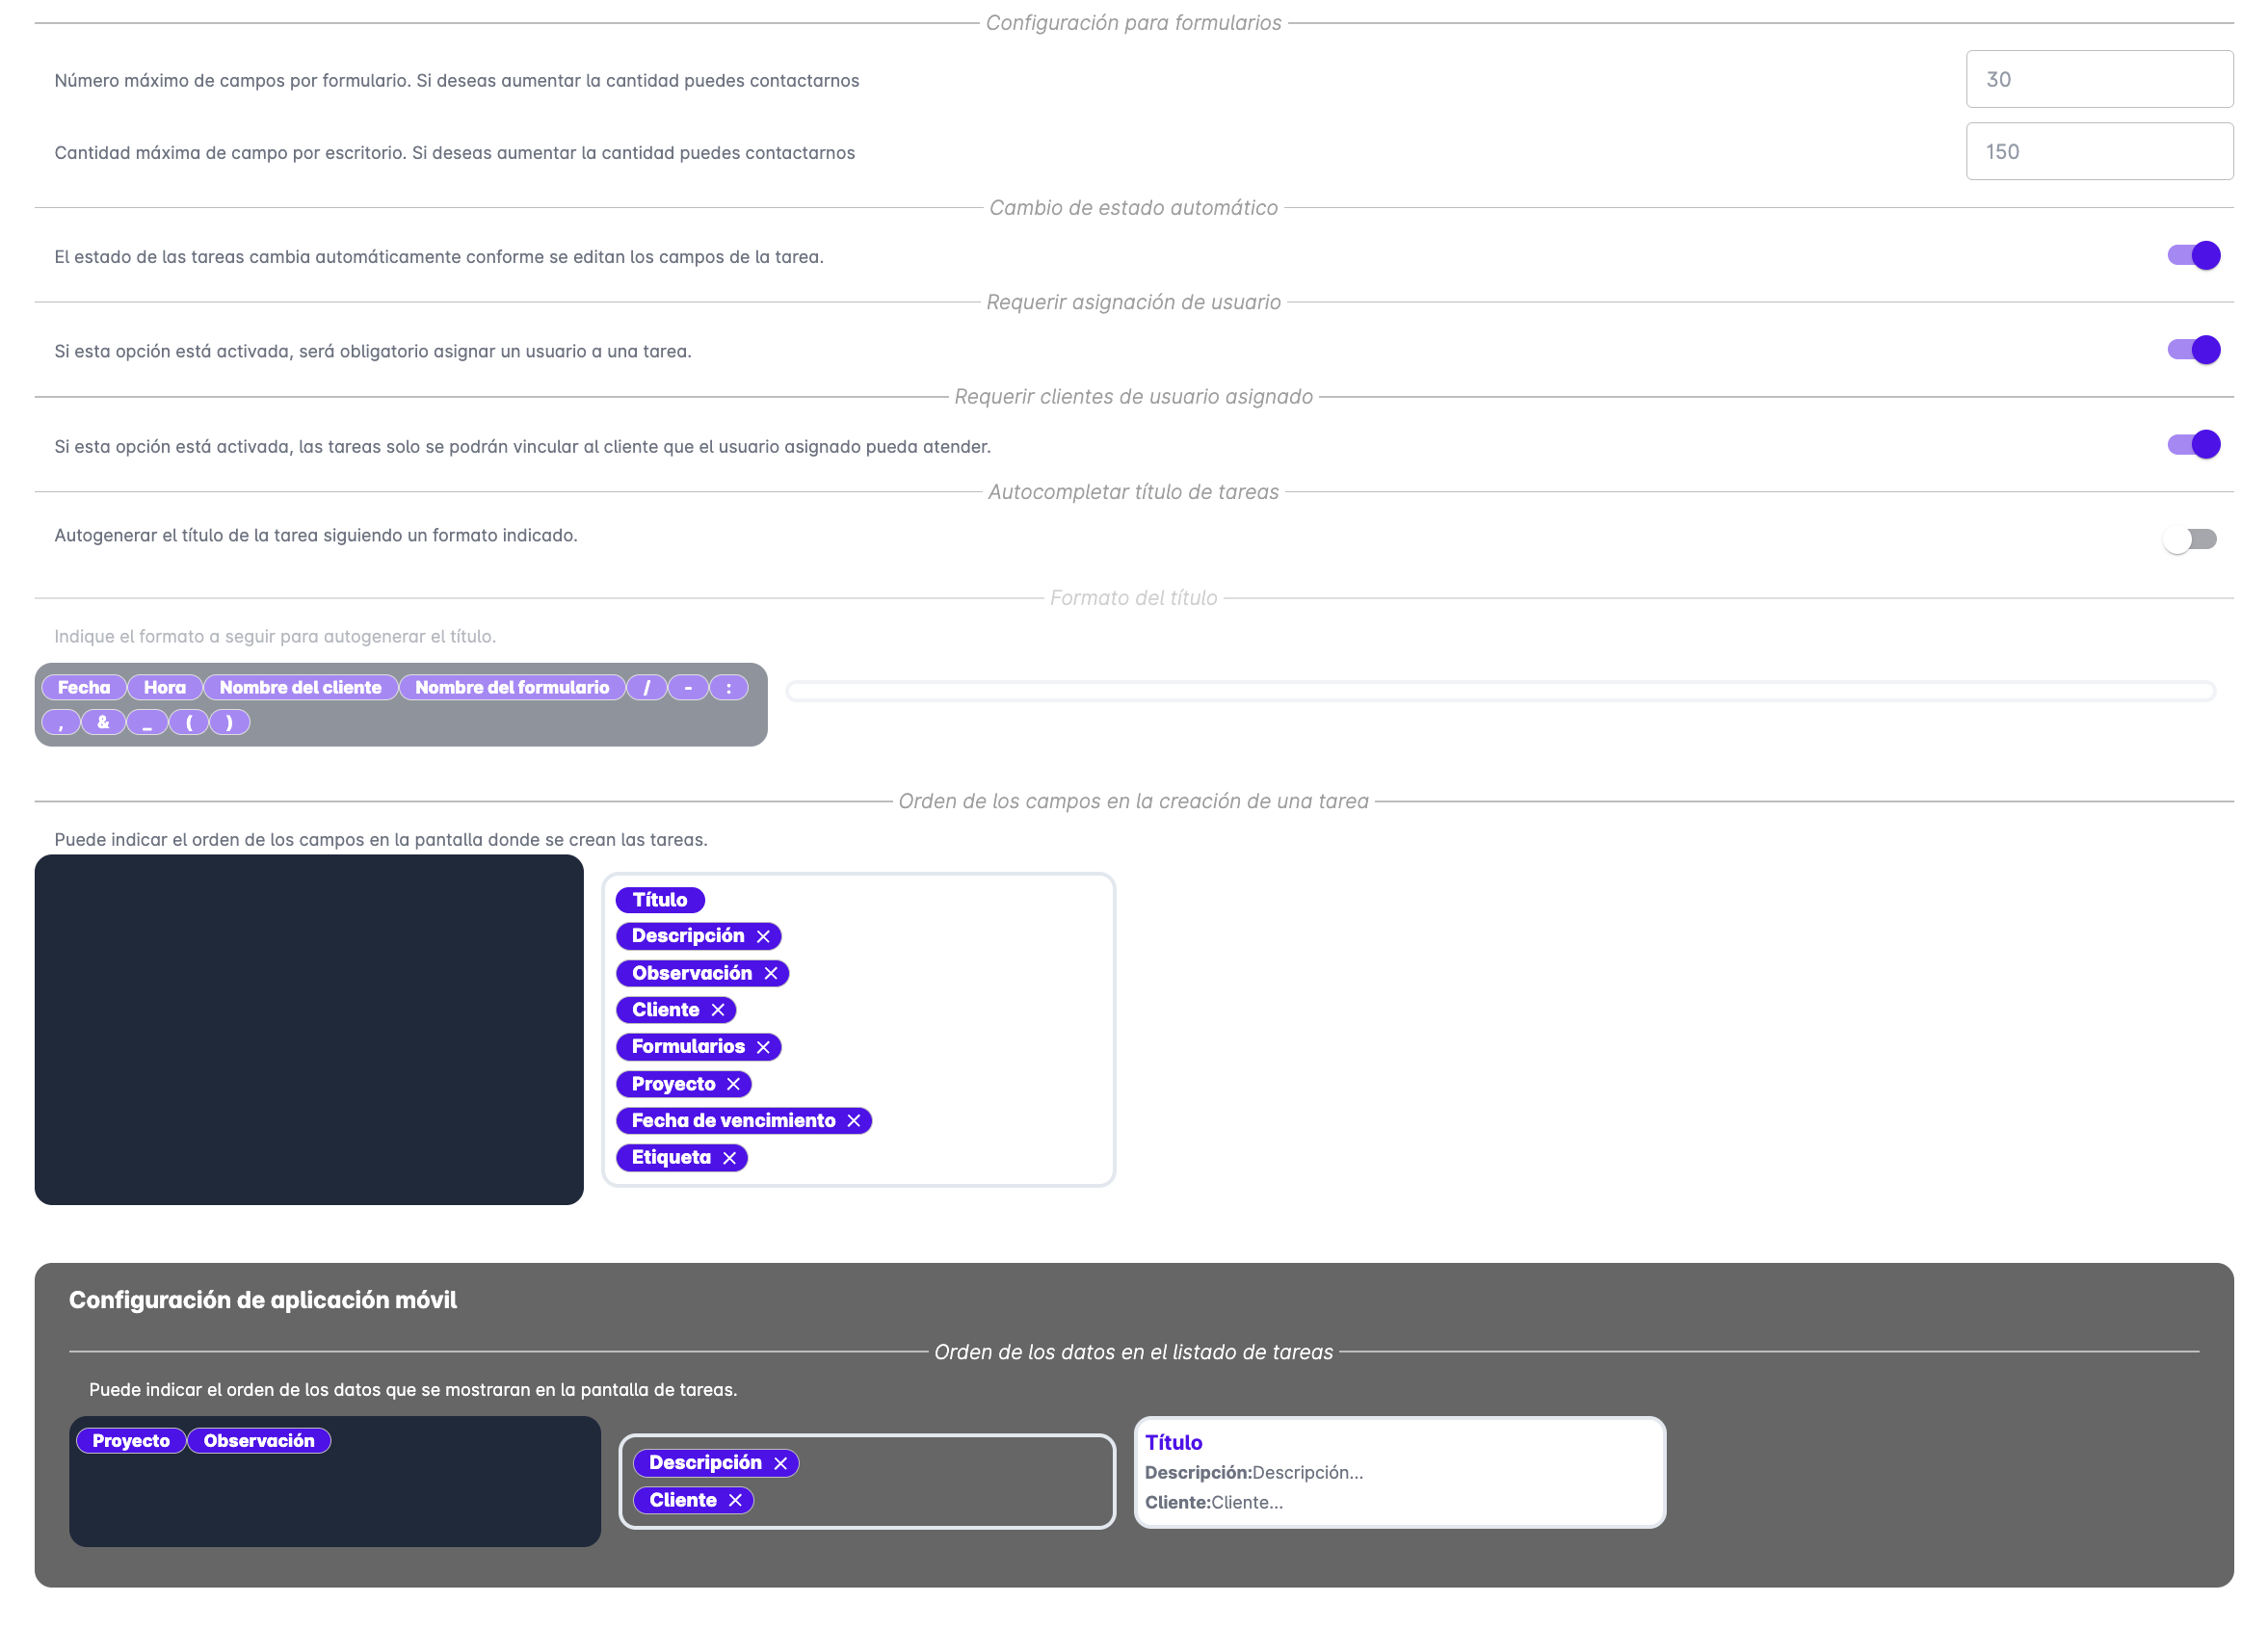
- Form configuration - Indicates the total number of fields allowed across all forms in the Workspace and the maximum number of fields a single form can have.
- Automatic status change - You can control whether tasks automatically change their status depending on the fields being filled in the form. For example, when the first field of a form is filled, the task can change its status to "Active".
- Require user assignment - You can control whether tasks must be assigned to a user before they can be created.
- Require clients of assigned user - You can control whether the clients that can be selected in tasks are restricted to the clients that the assigned user can serve, based on the teams linked to the user and the client.
- Auto-complete task title - You can control whether the task title is auto-completed according to the format specified in the following setting.
- Task title auto-complete format - You can specify the format that will be used to auto-complete task titles. Drag the available fields into the desired position to build the title.

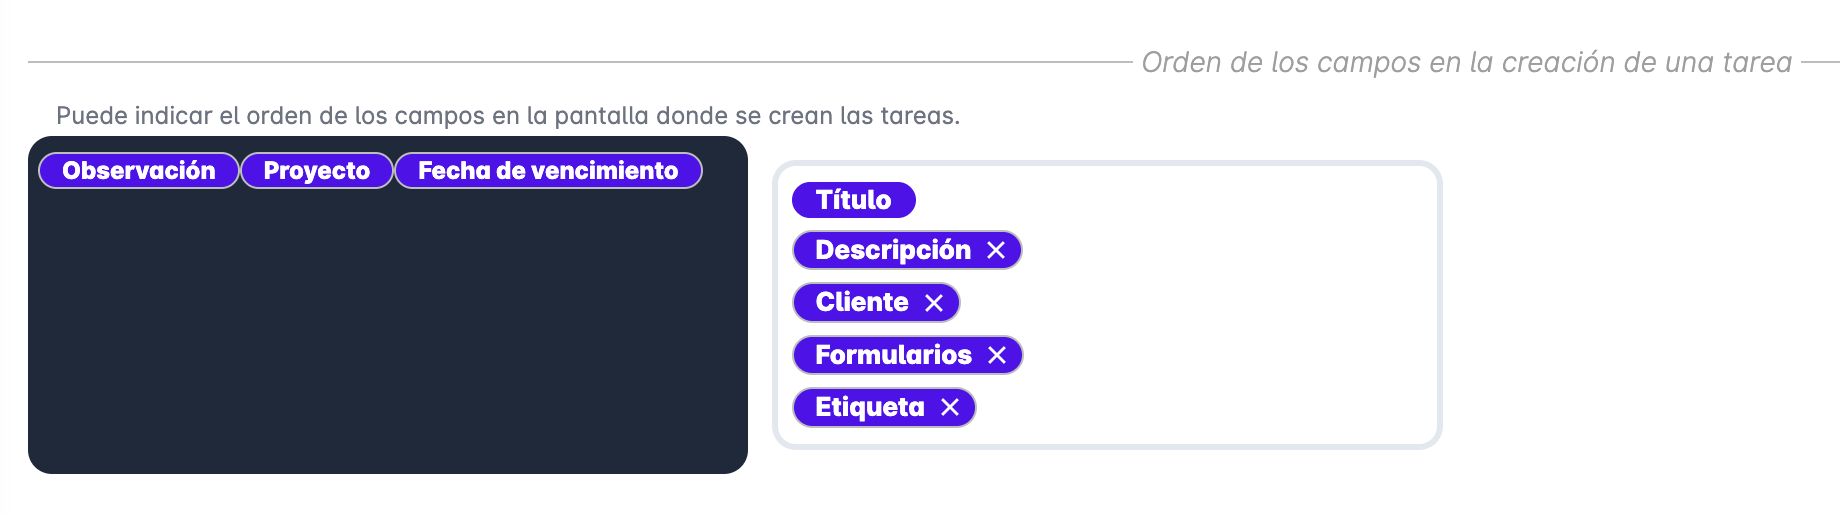
- Field order when creating a task - When creating or editing tasks, you can control which fields to show and the order in which they will be displayed. Drag the available fields into the desired position.
Mobile App-Specific Section
The settings in this section apply only to the OptaCheck mobile app.
- Field order in the task list - Drag the available fields into the desired position to control what is shown in the task list of the mobile app.

Location
The location section contains settings that apply to user location, geofences, and additional settings for the mobile app.
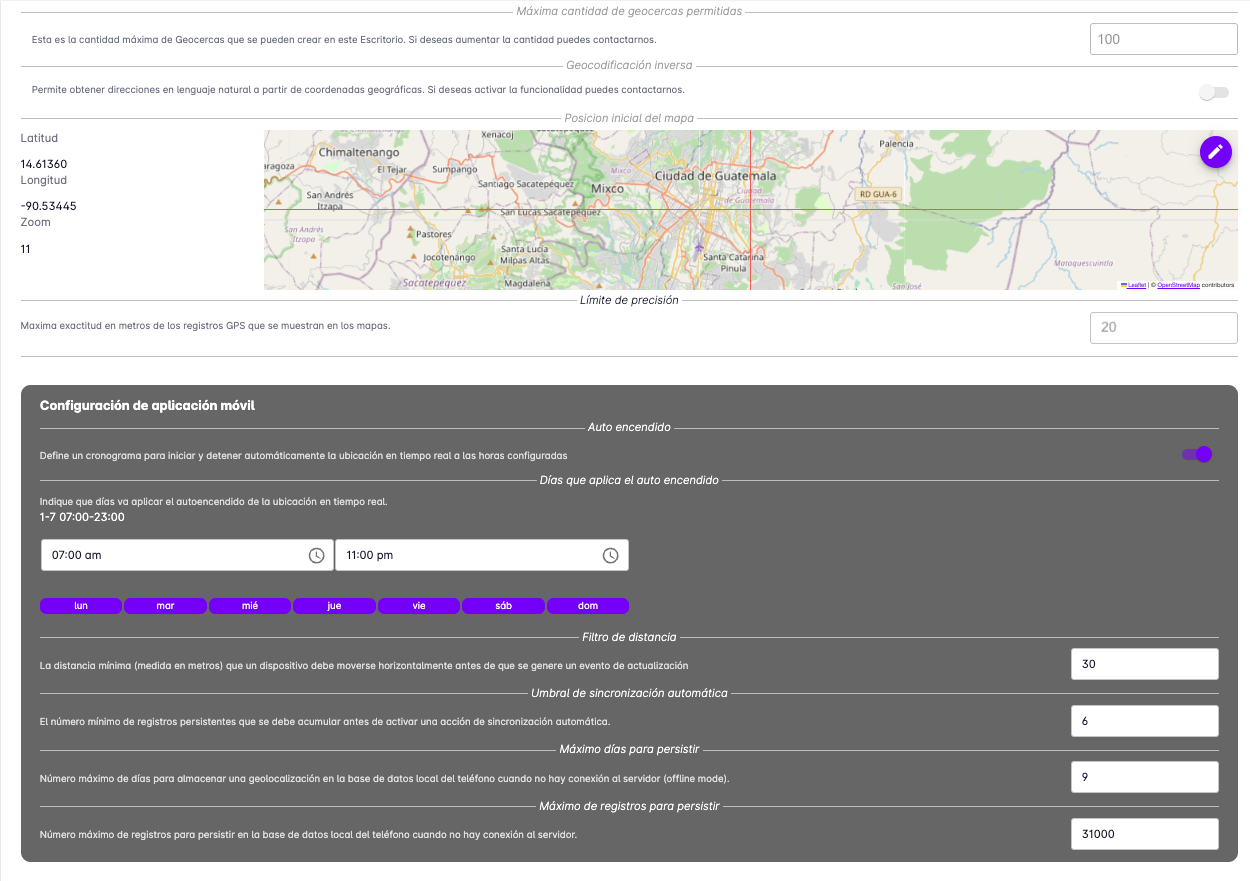
- Maximum number of geofences allowed - This is the maximum number of geofences that can be created in this Workspace.
- Reverse geocoding - Allows obtaining natural-language addresses from geographic coordinates.
- Initial map position - Here you can enter the geographic coordinates that will be used by default when a map is displayed. It is recommended to set a central location where most clients are usually found.
- Precision limit - The precision used to display user routes. Any coordinate with a precision greater than this value will not be taken into account.
Mobile App-Specific Section
The settings in this section apply only to the OptaCheck mobile app. The mobile app has several options that allow you to control location recording and energy consumption.
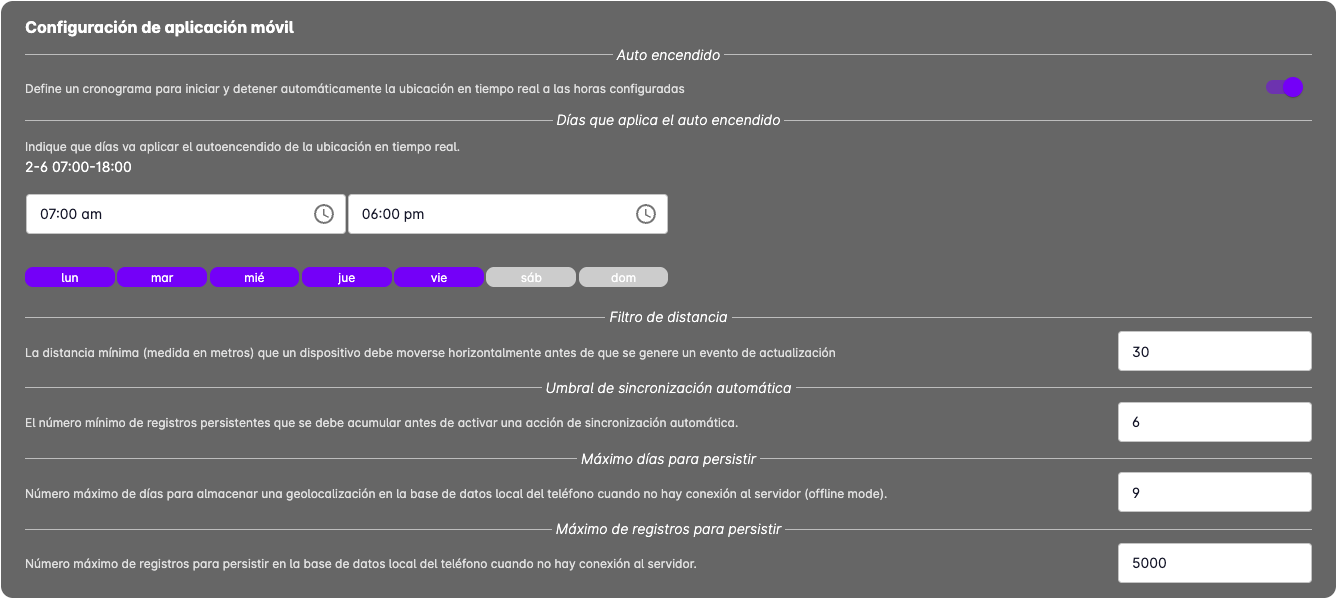
- Auto-start - Allows location tracking to turn on automatically when the device starts.
- Days that auto-start applies - You can specify the days of the week that auto-start will apply, as well as the time it should turn on and the time it should turn off.
- Distance filter - You can specify the minimum distance a user must travel before a route segment is recorded. The larger the value, the more energy is saved.
- Automatic sync threshold - With this option you can control the minimum number of records that accumulate before being sent to the server.
- Maximum days to persist - When there is no internet connection, this is the number of days records will be kept on the device before being deleted.
- Maximum records to persist - When there is no internet connection, this is the number of records that will be kept on the device before being deleted.
Integration
This section explains how to connect artificial intelligence assistants to your OptaCheck workspace. Currently, the integration with Claude is described. Future sections will document connections with ChatGPT and Microsoft Copilot.
What is an MCP Connector?
MCP stands for Model Context Protocol. In simple terms, it is a secure bridge that allows an AI assistant like Claude or ChatGPT to read information in real time from another application — in this case, OptaCheck.
Without this connection, you would have to copy information from OptaCheck, paste it into an AI assistant, and then ask your question. With the MCP connector, an AI assistant can get the answer directly from OptaCheck at the moment it is queried. You simply type your question in natural language and the AI assistant does the rest.
Important aspects to know:
- Read-only. An AI assistant can only read data from OptaCheck. It cannot create, edit, or delete anything — the connection is strictly read-only.
- Limited to your account. The connection is tied to the user's OptaCheck account. Claude only sees what that user is allowed to see within their workspace.
- No shared passwords. The user logs in to OptaCheck through a standard login screen. OptaCheck automatically issues a secure access key; no password is shared with Claude (Anthropic) or ChatGPT (Open AI).
Once connected, you can ask questions in natural language and the AI assistant will query your OptaCheck data to answer them. Some examples:
| Sample question | What the AI queries |
|---|---|
| "Show me today's open tasks" | Tasks filtered by date and status |
| "Who visited client Acme this week?" | Visit records for that client |
| "Give me all the details of task [Title]" | All fields and form responses for that task |
| "List all members of the logistics team" | Users grouped by team |
| "How many visits did we record last month?" | Visit count for the period |
| "What forms does our workspace use?" | All form definitions in the workspace |
| "Show me the response distribution for the 'Status' field in form X" | Frequency analysis of responses for that field |
| "Find the user with email maria@example.com" | User profile by email |
| "Show me the dashboard statistics for April" | Consolidated operational metrics for the month |
Integrations Page
To view the active integrations in your workspace, open Management → Configuration and select the Integrations tab.
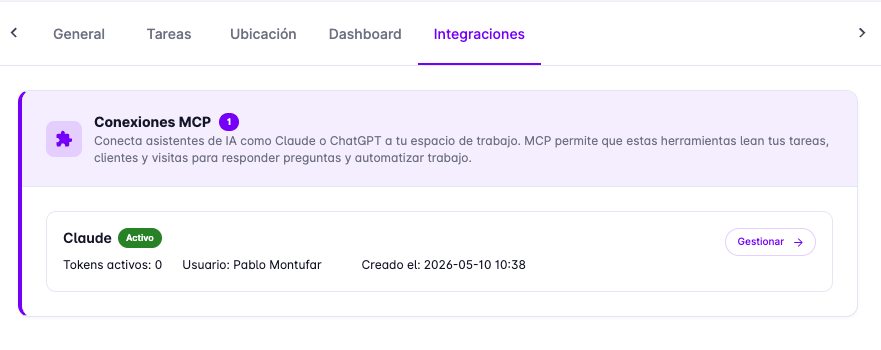
On this page you will see the MCP Connections section, which shows all AI assistant integrations configured in the workspace. For each connection:
- Assistant name and its status (Active or inactive)
- Active tokens — number of user sessions currently authorized
- User — the OptaCheck user who created the integration
- Creation date
- Manage → button to view details and administer the connection
Click Manage → to open the detail view of a specific integration.
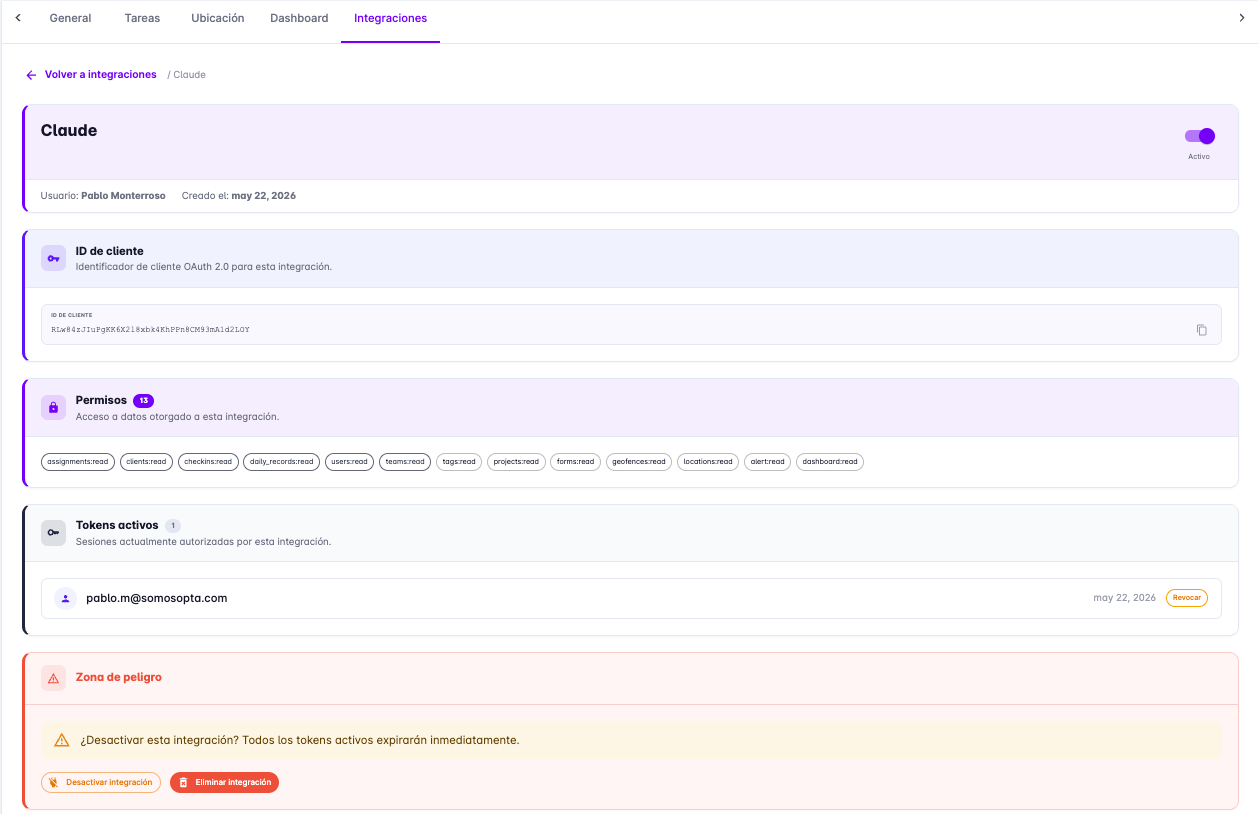
In the detail view you will find four sections:
- Client ID — OAuth 2.0 identifier assigned to this integration. It is a read-only value you can copy if needed.
- Permissions — List of the 13 read-only permissions granted to this integration. They show exactly what data the AI assistant can query.
- Active tokens — User sessions currently authorized. Each row shows the user's email and the authorization date. The Revoke button lets you invalidate a specific user's session without affecting others.
- Danger zone — Contains two destructive actions: Disable integration (all active tokens expire immediately, but the integration can be re-enabled) and Delete integration (permanently deletes the integration).
At the top of the detail view you will also find a toggle to enable or disable the integration without deleting it.
Connecting Claude to OptaCheck
The full process takes approximately one minute. You only need your OptaCheck credentials — no need to create tokens manually.
Prerequisite: The workspace administrator must have enabled the "Allow MCP connections" permission on the user's account. If login works but Claude cannot retrieve data, contact your administrator to activate this permission.
Step 1 — Open the connectors panel in Claude
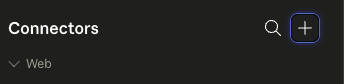
In the Claude web or desktop app, locate the Connectors panel in the left sidebar. Click the "+" button in the upper-right corner of that panel to add a new connector.
Step 2 — Choose "Add custom connector"

A menu will appear with two options. Select "Add custom connector".
Step 3 — Enter the OptaCheck connector details
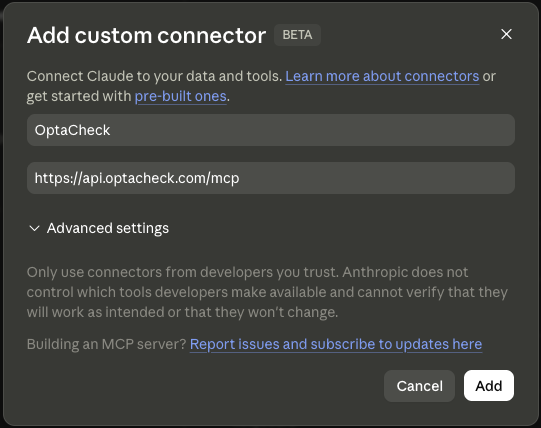
A form will open. Complete the two fields exactly as shown:
- Name:
OptaCheck - URL:
https://api.optacheck.com/mcp
Leave the advanced settings section unchanged and click Add.
Step 4 — Sign in to OptaCheck
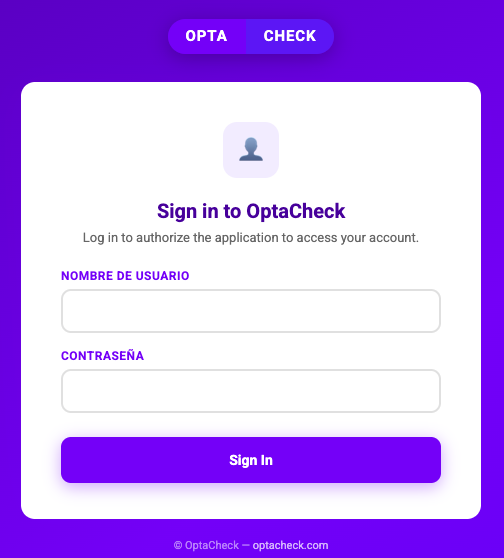
When you activate the connector for the first time, Claude will automatically open the OptaCheck login screen. Enter your:
- Username
- Password
These are the same credentials you use to log in to the OptaCheck web app. Click Sign In.
The user is signing in directly to OptaCheck — no credentials are shared with Claude or Anthropic. This is a standard, secure OAuth authorization flow.
Step 5 — Authorize Claude's access to your data
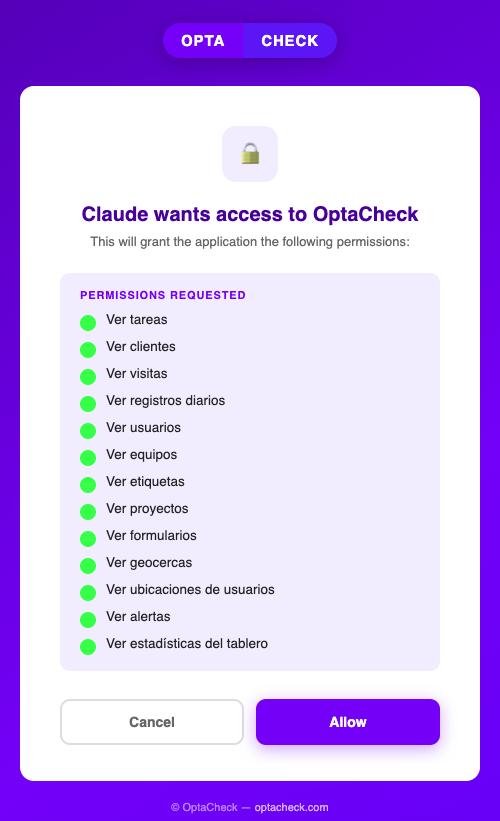
After signing in, OptaCheck will show a confirmation screen titled "Claude wants access to OptaCheck". All the read permissions Claude requests will be listed.
You have two options:
- Allow — Authorizes the connection and returns to Claude.
- Cancel — Cancels the process without granting access.
Click Allow to complete the connection.
Step 6 — Connection active
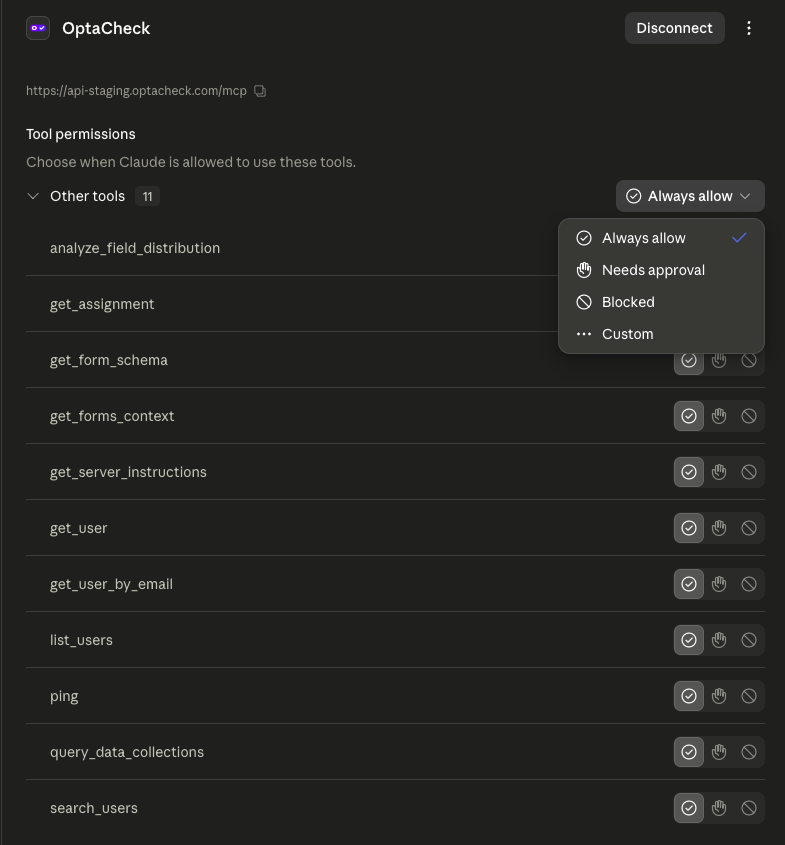
The OptaCheck connector is now connected. Claude will display a list of 11 available tools. For each tool you can choose:
- Always allow — Claude uses the tool automatically when needed.
- Needs approval — Claude asks before each use.
- Blocked — Claude cannot use that tool.
Step 7 — Use the OptaCheck connector in chat
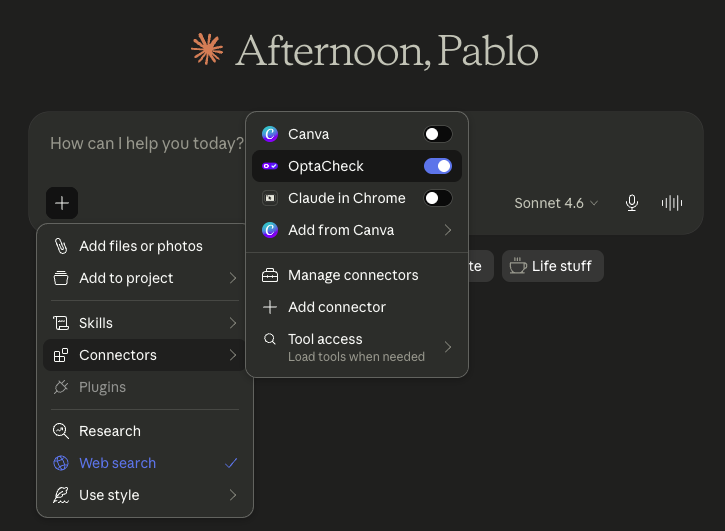
To use the OptaCheck connector in a chat session, enable it by clicking "+ → Connectors → OptaCheck" (the toggle will turn blue/purple).
The connector must be activated each time you start a new conversation where you want to use OptaCheck data. It does not activate automatically in every new chat.
The recommended setting for most users is Always allow, so Claude can query information without interrupting the conversation.
From this point on you can type questions in natural language and Claude will respond using real-time data from your OptaCheck workspace.
Note: Once you have completed the login (steps 4 and 5), you will not need to repeat it in future conversations. You will only need to toggle the connector (step 7) each time you start a new conversation.
Permissions Claude requests
When authorizing access in step 5, you grant Claude read-only access to the following data categories:
| Permission | What it covers |
|---|---|
| View tasks | Tasks assigned to field agents |
| View clients | Client records and accounts |
| View visits | Field visit records to clients |
| View daily logs | Daily activity records |
| View users | Field agents and workspace supervisors |
| View teams | User groups |
| View tags | Tags applied to tasks and clients |
| View projects | Task groupings |
| View forms | Form templates used in tasks |
| View geofences | Geographic zones configured in the workspace |
| View user locations | Real-time or historical positions |
| View alerts | Workspace alerts and notifications |
| View dashboard statistics | Consolidated operational metrics |
Claude cannot write, create, modify, or delete any data in OptaCheck.